PDFCool Studio Help

Sign document is a way of authenticating the contents of a document. A
document with a valid signature is guaranteed not to have been changed since
being signed. A valid signature has a digital ID issued by a trusted certificate
authority. In order to sign documents, a digital ID may be imported or you can
create a self-signed digital ID with PDFCool Studio.
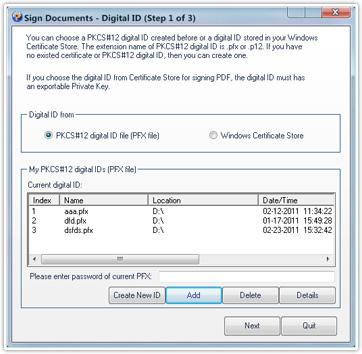
You can choose a
PKCS#12 digital ID create before, whose extension name is .pfx or .p12. You can
also choose a digital ID stored in you Windows Certificate Store. If you have no
existed certificate or PKCS#12 digital ID, you can create a new one with PDFCool
Studio.
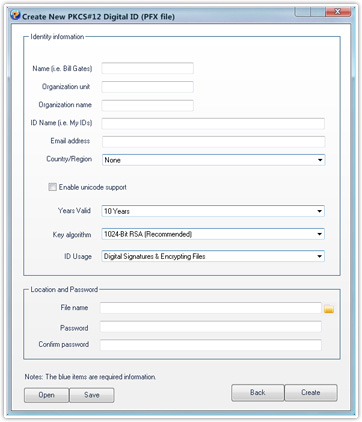
To open the "Sign Document -- Digital ID" dialog, from the top menu bar,
choose "Security > Sign Document". Click on the "Create New ID" button to
open the "Create New Digital ID" dialog. Enter the relevant information in those
textboxes. Then, choose outputting name of the digital ID, and set the password.
Note: the blue items are required information.
Choose the "PKCS#12 digital ID file (PFX file)" option. Click on the "Add"
button located in the bottom of the dialog to add PKCS#12 digital IDs to the
list box. Choose a proper one by clicking the item, and enter the password;
You can also choose the "Windows Certificate Store" option, and the
digital IDs in the Windows Certificate Store will automatically add to the list
box. Choose a proper digital ID by clicking the item.
Then
click on the "Next" button to open the Appearance of sign field dialog.
Note: If you choose the digital ID from Certificate Store for signing
PDF, the digital ID must has an exportable Private Key.
Click on the dropdown list of Document, and choose one you want to sign from
the PDF documents opened in program. Then choose a proper one from the
appearance models (or double click to choose one) as the sign
appearance;
Note: You can view all the models by moving
the scrollbar or dragging the models by mouse.
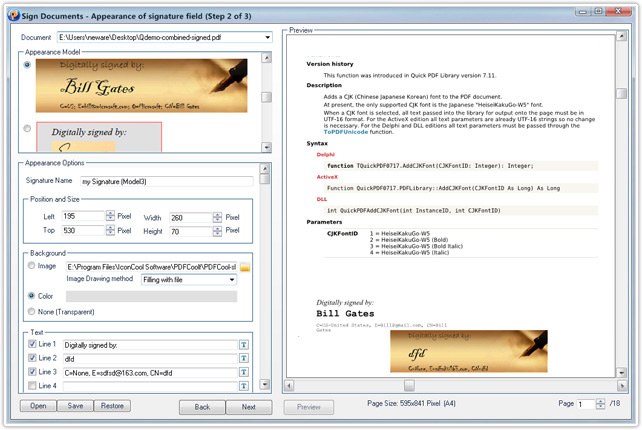
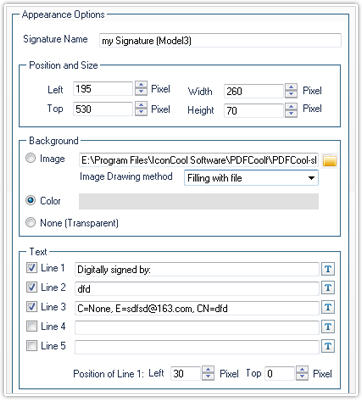
Set the name of signature field: Type the
name of signature field in the "Signature Name" text box;
Set the
position and size of signature field: Set the signature fieldˇŻs size
and position in PDF document in the "Position and Size" box. You can
directly use mouse to drag the signature field to set the position and size in
the Preview pane;
Set the background of the signature field:
Choose Image option, and click on the ![]() button to choose an image, which
you want to add as the background of signature field. Then, choose the tile
method. Choose the Color option, and click on the color bar to choose a
background color of signature field in the color dialog. You can also choose
"None" option to set the none-background signature field (transparent signature
field);
button to choose an image, which
you want to add as the background of signature field. Then, choose the tile
method. Choose the Color option, and click on the color bar to choose a
background color of signature field in the color dialog. You can also choose
"None" option to set the none-background signature field (transparent signature
field);
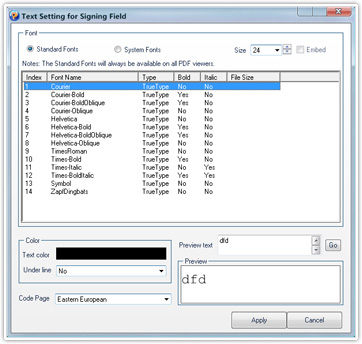
Set the text of signature field: PDFCool Studio
allows the user to set up to 5 lines text. You can type any text you want to
display as signature in the text box. Click on the ![]() button to open the "Text Setting
for Signing Field" dialog, in which you can set the text font, size, color,
underline and embedded font etc.
button to open the "Text Setting
for Signing Field" dialog, in which you can set the text font, size, color,
underline and embedded font etc.
Set the border of signature
field: Click on the color bar in "Border" box, and choose the border
color of signature field in the color dialog. You can also choose the "None"
option to set the none-border signature field;
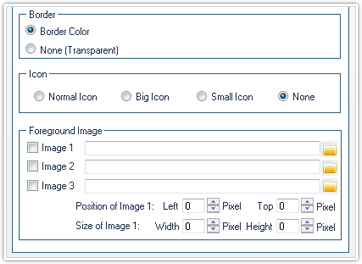
Set the icon of signature field: You can set the icon as normal icon, big icon, small icon and none;
Set foreground image of signature field: PDFCool Studio
allows the user to set up to 3 foreground images. Click on the ![]() button to choose the image you want to
display as foreground image. Choose the proper parameters, you can set the
foreground imageˇŻs size and position in the signature
field;
button to choose the image you want to
display as foreground image. Choose the proper parameters, you can set the
foreground imageˇŻs size and position in the signature
field;
Note:
Once you change the parameters of
signature field in the "Appearance Options" box, click on the Preview button
to view the changed signature field. By click on the Open, Save, and Restore
buttons lactated in the bottom left corner, the user can choose to open the
signature project files, save the current options as project file, and back to
the default value.
Click on the Next button to open the "Sign Document -- Step 3 of 3" dialog.
Click on the dropdown list of the "Reason for signing" to choose a proper signing
reason. Type the location of signing in the Location text box;
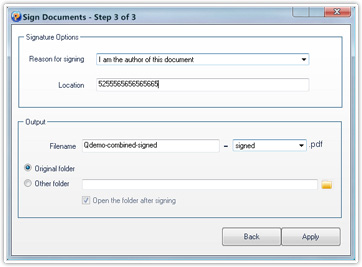
Set the output file name, the program default output name is the original name with "- signed.pdf". You can also type new output file name. About the output path, you can use the original folder as output path, or choose other output path;